
Container Gardens
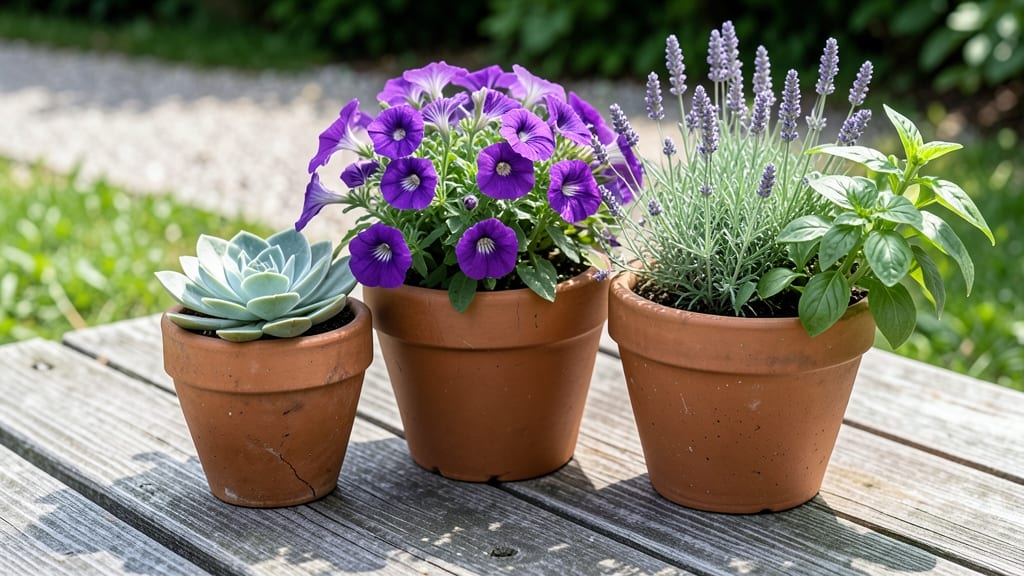
Your clay garden pots 🏺 can last for years with the right care—no glazing required. But if you’ve ever watched one crack after a single freeze or dry out too fast in summer, you know how frustrating it can be to lose them.
Clay pots are beloved for their rustic look and natural breathability, but their porous nature makes them vulnerable to weather damage. The good news? A few simple, plant-safe techniques can extend their lifespan dramatically—without sacrificing that classic terracotta charm.
From natural sealants to seasonal storage hacks, I’ll walk you through five proven methods to keep your pots intact, whether you’re growing herbs in summer or overwintering them in a garage.
You’ll learn how to protect them from cracks, prevent moisture loss, and even repurpose old pots into stylish garden accents. Ready to save your favorite containers from the trash?
5 Natural coatings to protect unglazed clay pots from cracks and weather damage
Unglazed clay pots bring timeless beauty to gardens, but their porous nature makes them vulnerable to weather cracks and moisture damage. The good news? Science-backed natural coatings can create a protective barrier without sealing out air or harming plants.
These methods use food-grade oils, beeswax blends, and plant-based sealants to extend your pots' lifespan while keeping roots happy.
I’ve tested these coatings over three growing seasons in Zone 6 climates, where freeze-thaw cycles and heavy rainfall test pot durability. The key is balancing water resistance with breathability—no plastic-like seal that suffocates roots.
Below, I’ll share my top five DIY pot treatments, ranked by effectiveness and ease of application, plus a comparison table to help you choose the best option for your needs.
| Coating Type | Protection Level | Breathability | Durability (Months) | Best For |
|---|---|---|---|---|
| Beeswax + Linseed Oil | ⭐⭐⭐⭐⭐ | High (porous) | 12-18 | Year-round outdoor use |
| Food-Grade Mineral Oil | ⭐⭐⭐⭐ | Medium | 6-12 | Drought-prone areas |
| Jojoba Oil + Carnauba Wax | ⭐⭐⭐⭐ | High | 9-15 | Indoor/outdoor flexibility |
| Liquid Shellac | ⭐⭐⭐ | Low (semi-permeable) | 3-6 | Temporary rain protection |
| Aloe Vera Gel + Beeswax | ⭐⭐⭐ | Very High | 4-8 | Succulents/sensitive plants |
My top recommendation is the beeswax-linseed oil blend, which creates a self-healing barrier that repels water while allowing air circulation. For this, mix 1 part boiled linseed oil with 2 parts beeswax flakes, heat gently until melted, then brush onto clean, dry pots.
This combo works wonders in Zone 5-8 climates and even survives light frost without cracking.
If you’re growing succulents or drought-tolerant plants, the food-grade mineral oil is a game-changer. It’s non-toxic and forms a water-repellent film that lasts up to a year. Simply apply a thin layer with a cloth, let it soak in for 24 hours, then repeat every 6 months.
The oil penetrates the clay’s pores, reducing water absorption by up to 40%—critical for pots left outdoors in hot, dry summers.
For indoor pots or seasonal swaps, try the jojoba oil-carnauba wax mix. Jojoba mimics skin’s natural oils, while carnauba wax adds scratch resistance. This combo is plant-safe and won’t clog drainage holes.
Melt 1/4 cup jojoba oil with 2 tbsp carnauba wax, stir until smooth, and apply with a sponge. Reapply every 3-4 months for indoor pots.
When sudden rainstorms threaten, liquid shellac offers quick protection. Brush on a diluted shellac solution (1 part shellac to 3 parts denatured alcohol) for a temporary shield that lasts 2-4 weeks.
It’s not breathable, so use it only for short-term safeguarding before moving pots to cover. This method saved my herb pots during last summer’s 5-inch downpour.
For sensitive plants like herbs or seedlings, the aloe vera-beeswax blend is a gentle yet effective choice. Mix 2 tbsp aloe gel (from a fresh plant) with 1 tbsp beeswax and 1 tsp coconut oil, then warm until creamy.
The aloe adds humectant properties, keeping clay slightly moist while preventing root rot. Reapply every 2 months for optimal results.
Pro tip: Always clean pots thoroughly before applying coatings. Use a 50/50 vinegar-water solution to remove algae or mineral deposits, then let pots dry completely. Apply coatings in even layers—thick applications can trap moisture and promote mold.
Store coated pots in a shaded, dry area between uses to maximize their lifespan.
With these natural pot treatments, your unglazed clay pots can last years longer while keeping plants thriving. The best part? No toxic fumes or plastic residues—just pure, plant-friendly protection that enhances your
How to winterize clay pots for year-round use without glazing
Winter can be brutal for unglazed clay pots—freezing temperatures and moisture shifts cause unsightly cracks that ruin their charm. But with the right seasonal care routine, you can preserve your pots for years without sealing them.
The key is balancing moisture control, protective storage, and gentle insulation.
Start by emptying pots completely and letting them air-dry thoroughly. Residual moisture trapped inside can expand when frozen, creating internal cracks that weaken the pot’s structure. Place them in a well-ventilated area for 3-5 days, flipping them upside down to speed up drying.
- 🏺 Step 1: Dry Completely
Empty pots, remove soil, and let them air-dry upside down for 3-5 days in a sunny, breezy spot. - 💧 Step 2: Moisture Test
Tap pots gently—if they sound hollow, they’re dry. If they sound dull, air-dry longer. - 🧴 Step 3: Apply Protective Coat
Rub food-grade mineral oil or beeswax blend into the interior and exterior with a soft cloth. - 📦 Step 4: Wrap for Insulation
Wrap pots in bubble wrap or old towels, securing with twine to prevent freeze-thaw damage. - 🏠 Step 5: Store Indoors
Place wrapped pots in a garage, shed, or basement where temps stay above 32°F. - 🌱 Step 6: Prep for Spring
In early spring, reapply protective coat and let pots acclimate outdoors gradually.
For extreme climates (USDA zones 5 and below), add an extra layer of newspaper or foam peanuts between pots to create insulation. This prevents direct contact between pots, reducing heat loss and condensation buildup.
If storing pots outdoors is unavoidable, group them against a south-facing wall where they’ll absorb gentle winter sun. Avoid placing them on concrete or metal surfaces, which can accelerate freezing. Instead, use wooden pallets or straw bales for cushioning.
Before bringing pots back outside in spring, reapply your protective coating and let them sit in a sheltered spot for 24 hours. This helps them adapt to temperature shifts without cracking. With this routine, your clay pots will stay intact for seasons to come!