
How To
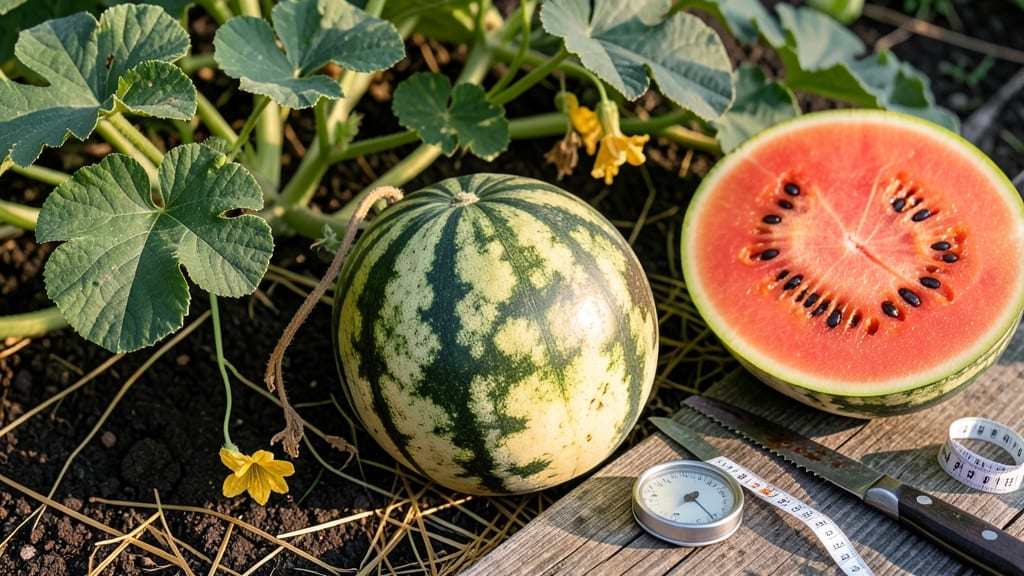
Knowing when to pick watermelon from your garden means the difference between a juicy, sweet reward and a mealy, overripe letdown — and the secret lies in three simple, non-invasive tests.
Picture this: you’ve spent weeks tending to your 🍉 vines, and now the melons are swelling fast. How do you know when they’re really ready? Cutting one open is risky, but there are foolproof ways to tell — without the guesswork.
From checking the tendril near the stem to tapping for a hollow sound, these field-tested signs take the mystery out of harvest time. I’ll walk you through each method, plus what to watch for if your melons are still firm or already too soft.
By the end, you’ll confidently pluck your watermelons at peak ripeness — every time. No more wasted effort, no more bland bites. Just perfect, vine-ripened flavor.

3 Field-tested signs to identify ripe watermelon without cutting
There’s nothing worse than slicing into a watermelon only to find it’s still rock-hard or overly mushy. The good news? You don’t need to cut open every melon to test its ripeness.
Instead, rely on these three foolproof field signs—backed by gardeners and agronomists alike—to know when your watermelon is ready to harvest. These cues work for both classic striped varieties and deep-green heirlooms.
Why trust these signs? Watermelons ripen from the inside out, and their outer appearance and texture change predictably as they mature. By combining visual checks, tactile tests, and sound cues, you’ll avoid the guesswork.
Plus, these methods work even if you’re harvesting in hot afternoons when melons might feel softer than usual due to heat.
Check the Field Spot Color
Look for the cream-colored field spot (the area where the melon rested on the ground). When ripe, this spot turns yellowish or buttery—not white or green. This change signals the melon’s sugars have fully developed.
Test the Tendril Dryness
The small tendril nearest the stem should be dry and brown, not green or wilted. This tendril acts like a ripeness timer—once it dies, the melon is ready within 1-2 days. Pro tip: If the main vine’s tendrils are still green, wait a few more days.
Perform the Thump Test
Tap the melon’s blossom end (opposite the stem) with your knuckles. A ripe watermelon will sound deep and hollow, like a drum. If it thuds like a dull drum or sounds flat, it’s not ready. Avoid thumping on hard ground—use your hand as a buffer to avoid bruising.
These three signs work best when used together. For example, a melon might pass the field spot test but fail the thump test—this means it needs 1-2 more days to ripen fully. Heatwaves can speed up ripening, so check melons daily during hot spells to avoid missing the window.
Don’t overlook the stem’s condition—it’s one of the most reliable indicators. A ripe watermelon’s stem will dry out and turn brown near the fruit. If it’s still green or moist, the melon needs more time.
This cue is especially critical for heirloom varieties, which often ripen slower than hybrid types.
For extra precision, combine these tests with the "finger squeeze" near the blossom end. A ripe melon will have a slight give—like pressing a ripe avocado—without feeling mushy.
If it’s rock-hard, it’s underripe; if it’s too soft, it’s overripe. This tactile check is my go-to backup when the other signs are borderline.
Environmental factors like temperature and rainfall can throw off ripeness cues. In hot, dry climates, melons may ripen faster, so prioritize the tendril and thump test.
In cool, wet seasons, focus on the field spot color and stem dryness, as these signs are less affected by moisture levels. Adjust your harvest timing based on your local climate patterns.
Once you’ve confirmed ripeness, use a sharp knife or pruners to cut the stem 1-2 inches above the melon. Avoid dragging melons across the vine or soil to prevent bruising.
Store ripe watermelons in a cool, dry place (50–55°F) for up to 2 weeks—or enjoy them fresh the same day for peak sweetness.
Pro move: Keep a harvest journal to track which signs worked best for your specific watermelon variety. Over time, you’ll refine your skills and predict ripeness with near-perfect accuracy—no guesswork required.
The first time you bite into a watermelon you’ve picked at the exact peak ripeness, you’ll never want to cut one open again without checking these cues first.
Common mistakes that trick gardeners into picking watermelons too early or too late
Even experienced gardeners fall for common watermelon ripeness myths that lead to premature or overripe harvests. The biggest mistake? Assuming size equals sweetness. I’ve seen gardeners pull melons at 15 pounds only to find them bland because they weren’t fully ripe.
Watermelons don’t follow a strict weight-to-sweetness rule—some varieties stay small but packed with flavor, while others grow massive but never develop proper sugars.
Another trap is judging ripeness by vine health. A thriving vine doesn’t guarantee ripe fruit. I’ve harvested from vines bursting with energy only to discover the melons were still hard inside.
The vine’s condition reflects overall plant health, not individual fruit maturity. Always check the melon itself, not just the vine’s appearance.
Color is another deceptive clue. While most watermelons darken as they ripen, some varieties—like yellow-fleshed types—never develop deep green rinds. Relying solely on color can lead you to harvest too early. Instead, combine color with the field spot test and tendril dryness we covered earlier for accurate results.
The Biggest Ripeness Myths
Myth: "The bigger the melon, the sweeter it is." Reality: Size doesn’t equal ripeness—some varieties stay small but burst with flavor. Always check the field spot and tendril first.
Myth: "If the vine looks healthy, the melon is ready." Reality: Vine health doesn’t determine fruit ripeness. Test the melon directly using the thump test and stem color.
Myth: "All watermelons ripen at the same rate." Reality: Heirloom varieties often take 10-14 days longer than hybrids. Adjust your harvest timeline based on the specific type you’re growing.
Heatwaves throw another wrench into ripeness timing. During 90°F+ days, melons can appear ripe on the outside but remain starchy inside. I’ve had gardeners rush to harvest after just 2 days of extreme heat, only to find the flesh still pale and underdeveloped.
When temperatures spike, prioritize the thump test—it’s the most reliable indicator during heat stress.
Don’t ignore the blossom end either. Many gardeners focus only on the stem side, but the blossom end (where the flower was) often shows the first signs of ripeness.
A ripe melon’s blossom end will feel slightly softer and may show cracking or yellowing near the stem. This is your final check before harvesting.
Finally, resist the urge to harvest just because your neighbor’s melons are ready. Watermelon varieties ripen on different schedules. A Sugar Baby might be perfect at 30 days, while a Moon and Stars heirloom needs 45 days.
Always track your specific variety’s days to maturity and adjust your checks accordingly.
Mastering these cues means you’ll never again pick a watermelon too soon or too late. The key is patience—wait for all three ripeness signs to align before harvesting. Once you’ve got the system down, you’ll enjoy watermelons at their absolute peak, every single time. 🍉