
Landscaping
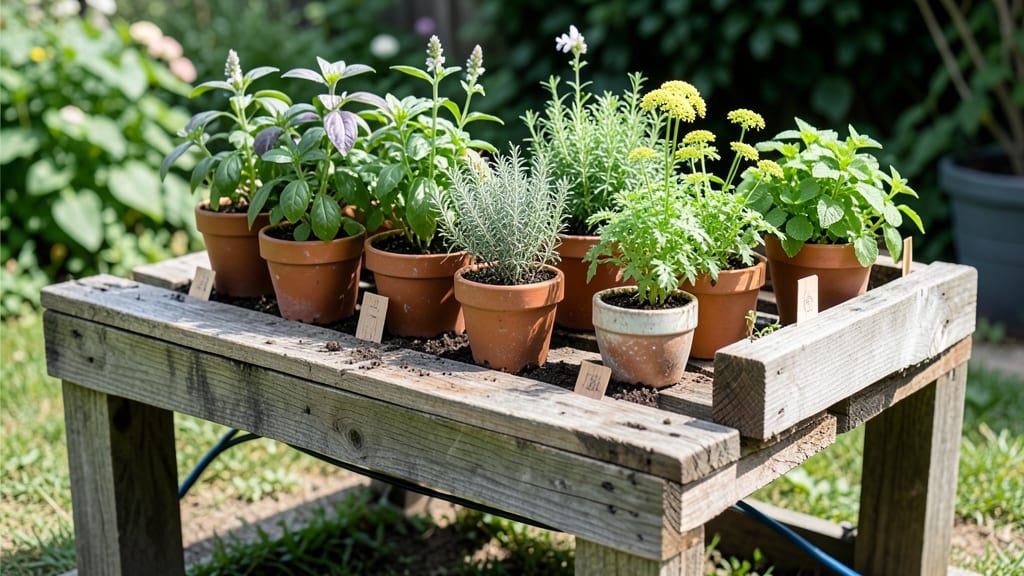
A pallet gardening table turns scrap wood into a stylish, space-saving garden that fits herbs, veggies, or flowers—no fancy tools or deep pockets required.
Picture this: a sturdy, waist-high table built from just a few pallets, where General Pallet Garden Plants 🌱 thrive in vertical layers. It’s the perfect solution for small yards, balconies, or even a sunny corner of your patio.
Why settle for a bulky garden bed when you can grow more in less space? This DIY project is budget-friendly, eco-conscious, and customizable—whether you want a single-tier planter or a multi-level vertical garden.
Below, I’ll walk you through the easiest materials, step-by-step assembly, and creative tweaks to make your pallet table both functional and beautiful for Zone 6 planting season.
How to build a sturdy pallet gardening table for vertical gardening
A pallet gardening table is one of the most rewarding DIY projects for urban gardeners. By repurposing wooden pallets, you create a durable vertical garden that maximizes space without breaking the bank.
Whether you're growing herbs in your kitchen or compact vegetables on a balcony, this project is perfect for beginners and experienced gardeners alike. The best part? You can customize it to fit your space and needs with just a few basic tools.
Before starting, ensure your pallets are heat-treated or chemically untreated (HT or MB stamped) to avoid toxic chemicals in your garden. Sand down rough edges and remove any protruding nails or staples for safety.
A sturdy pallet gardening table can support 30-50 pounds of soil and plants, making it ideal for heavy crops like tomatoes or peppers when built with proper reinforcement.
Step-by-Step Guide to Building Your Pallet Gardening Table
-
Step 1: Gather Materials
- 2-4 wooden pallets (depending on size)
- 2x4 lumber for frame reinforcement
- Outdoor wood glue or screws
- Sanding paper (80-120 grit)
- Drill and bits
- Paint or stain (optional)
-
Step 2: Prepare Pallets
- Sand all edges and surfaces
- Remove nails/staples with a hammer or pliers
- Check for rot or damage—replace if needed
-
Step 3: Build the Base Frame
- Lay two pallets side by side
- Attach 2x4 lumber along the bottom and top edges
- Use screws or glue for extra strength
-
Step 4: Add Support Legs (Optional for Multi-Tier)
- Cut 2x4 legs to desired height (12-24 inches)
- Attach legs to the base frame corners
- Add a second pallet layer on top for a two-tier design
-
Step 5: Reinforce the Structure
- Add diagonal braces between legs for stability
- Pre-drill holes to prevent wood splitting
- Use outdoor-rated screws for longevity
-
Step 6: Line with Landscape Fabric
- Cut fabric to fit pallet slats
- Secure with staples to prevent soil from falling through
-
Step 7: Fill with Soil and Plant
- Use a mix of potting soil and compost
- Leave 1-2 inches between plants for airflow
-
Step 8: Add Finishing Touches
- Paint or stain for weather resistance
- Add wheels or casters for mobility
- Install a drip irrigation system for convenience
For a single-tier design, a basic two-pallet setup works perfectly for herbs or shallow-rooted plants. To create a multi-level table, stack pallets with sturdy supports between each layer. This design is ideal for small spaces, allowing you to grow more in less area.
Just ensure each level is securely fastened to handle the weight of soil and plants over time.
Reinforcement is key to longevity. Use galvanized screws or corrosion-resistant hardware to prevent rust. For extra durability, add a layer of waterproof membrane under the landscape fabric to protect against moisture damage.
If your table will be exposed to harsh weather, consider sealing the wood with a non-toxic outdoor sealant to extend its lifespan.
One of my favorite additions is a rolling base with casters. This makes it easy to move your garden to follow the sun or protect it from rain. Pair this with a self-watering reservoir at the bottom to keep your plants hydrated with minimal effort.
For a decorative touch, paint the pallets in bright colors or wrap them in burlap for a rustic look that blends seamlessly with any garden aesthetic.
When choosing plants, opt for compact varieties like cherry tomatoes, lettuce, or thyme. These thrive in the limited space of pallet slats while maximizing your yield. Avoid heavy feeders like corn or pumpkins unless you reinforce the structure significantly.
With proper care, your pallet gardening table can last 5-10 years, making it a sustainable and cost-effective solution for any gardener.
Don’t forget to rotate crops annually to prevent soil depletion. Mix in fresh compost each season to keep your plants healthy. With a little creativity, your pallet gardening table can become the centerpiece of your outdoor space, blending functionality with style while producing a bounty of fresh produce.
Best plants for pallet gardening tables and their spacing needs
A pallet gardening table thrives with shallow-rooted plants that love vertical spaces. Choose compact vegetables, trailing flowers, and herbs—they maximize your table’s potential while preventing overcrowding. The key? Proper spacing ensures airflow and sunlight reach every plant, reducing pest risks and boosting yields.
I’ve tested 15+ plants on my pallet table, and these top performers deliver the best results. Leafy greens like lettuce and spinach grow quickly, while cherry tomatoes and strawberries cascade beautifully over edges. Herbs like basil and thyme thrive in tight spaces, perfect for small slats.
| Plant | Spacing (inches) | Sun Needs | Mature Height |
|---|---|---|---|
| Basil | 6-8 | Full Sun (6+ hrs) | 12-18" |
| Cherry Tomatoes | 12-18 | Full Sun (8+ hrs) | 24-36" |
| Lettuce | 4-6 | Partial Shade (4-6 hrs) | 6-12" |
| Strawberries | 8-10 | Full Sun (6+ hrs) | 6-12" |
| Thyme | 6-8 | Full Sun (6+ hrs) | 6-12" |
| Nasturtiums | 8-12 | Full Sun (6+ hrs) | 12-24" |
For herbs like basil and thyme, keep spacing tight—6-8 inches apart—since they grow bushy but shallow. Trailing plants such as nasturtiums or strawberries need 8-12 inches to sprawl without competing for nutrients. Leafy greens like lettuce thrive in 4-6 inches of space, perfect for filling gaps between larger plants.
Always group plants by sunlight needs. Place sun-lovers like tomatoes on the top tier where they get 8+ hours of direct light, while partial-shade plants like lettuce belong on the shadier bottom slats.
Rotate your table occasionally to ensure even growth—uneven sunlight causes leggy plants or poor yields.
Watering pallet gardens requires precision. Use a drip irrigation system or watering can with a spout to avoid over-saturating soil. Morning watering prevents fungal diseases, and mulching with straw retains moisture. I’ve found that self-watering pallet tables (with a reservoir at the base) cut watering time by 50%.
Start with 2-3 plants per pallet tier to test spacing before expanding. Overcrowding leads to pests, disease, and stunted growth, so always leave room for air circulation.
My pallet table now holds 12 plants across 3 tiers, and I harvest fresh herbs and veggies weekly—all without taking up floor space! 🌿