
Tools
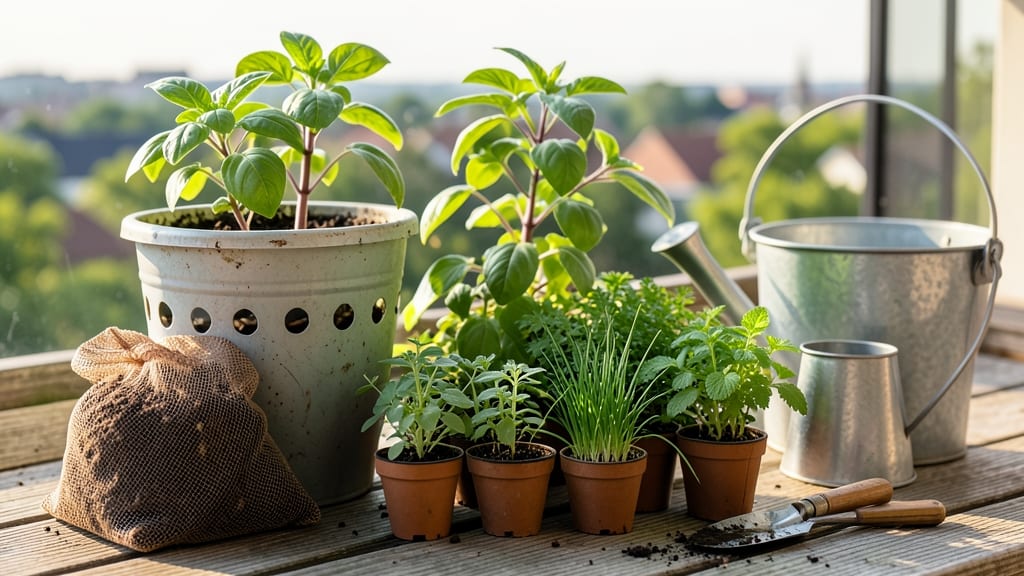
Bucket gardening 101 turns even the smallest balcony into a thriving garden with just a few simple containers and some smart planning.
If you’ve ever dreamed of growing fresh herbs, veggies, or flowers but lack space, bucket gardening transforms even the tiniest balcony or patio into a thriving green oasis—no yard required.
With the right setup, you can grow herbs like basil and parsley in just a few weeks, or even harvest tomatoes and peppers by summer. The best part? Your garden stays mobile, so you can move it for sunlight or shade as needed.
In this guide, I’ll walk you through choosing the perfect buckets, the soil mix that keeps roots happy, and the space-saving layouts that maximize every inch. Plus, I’ll share tips to avoid common pitfalls like overwatering or nutrient shortages.
Bucket gardening basics: containers, soil, and plant selection for beginners
Bucket gardening is one of the easiest ways to grow fresh produce and herbs when space is limited. With just a few essential supplies, you can create a productive garden on a balcony, patio, or even a windowsill.
The key lies in choosing the right containers, preparing well-draining soil, and selecting plants that thrive in confined spaces. Let’s break down everything you need to know to get started.
First, you’ll want to select durable, food-safe buckets with drainage holes. Plastic buckets are lightweight and affordable, while fabric grow bags offer excellent aeration. Avoid metal buckets, as they can overheat in the sun and may leach harmful chemicals into the soil.
Always drill drainage holes in the bottom if they’re not already present—this prevents root rot and ensures healthy growth.
Now that you have your containers, the next step is choosing the right soil mix. Regular garden soil is too heavy and compact for buckets, leading to poor drainage. Instead, opt for a lightweight potting mix blended with perlite or vermiculite to improve aeration.
For nutrient-rich soil, mix in compost or slow-release fertilizer. This combination keeps roots oxygenated while providing essential nutrients for your plants.
Here’s a quick reference to help you choose the best containers, soil, and plants for your bucket garden:
When selecting plants for your bucket garden, prioritize varieties with shallow root systems and compact growth habits. Herbs like basil, parsley, and cilantro thrive in buckets, as do leafy greens such as lettuce, spinach, and kale.
Strawberries are another excellent choice—they produce abundant fruit in small containers and even trail beautifully over the sides. Avoid root vegetables like carrots or potatoes, as they require deeper soil to grow properly.
One of the biggest mistakes beginners make is overwatering their bucket gardens. Since containers dry out faster than in-ground soil, it’s easy to drown roots if you’re not careful. Always check the soil moisture by sticking your finger about an inch deep—water only when the top layer feels dry.
Another common issue is root-bound plants, which occur when roots circle the bottom of the bucket. To prevent this, rotate your buckets every few weeks and consider repotting into larger containers if your plants outgrow their space.
To keep your bucket garden thriving, fertilize regularly during the growing season. Use a balanced, water-soluble fertilizer every 4–6 weeks, or opt for slow-release granules mixed into the soil at planting time.
Additionally, monitor your plants for pests like aphids or spider mites—a strong spray of water often deters these unwanted visitors. With the right setup and a little care, your bucket garden will yield fresh, homegrown produce all season long.
Ready to start? Grab a few buckets, some potting mix, and your favorite seeds or seedlings. In just a few weeks, you’ll have a lush, productive garden that fits perfectly in even the smallest of spaces. Happy planting!
5 Space-saving bucket gardening layouts for small spaces
Small spaces don’t mean small gardens! With the right bucket gardening layouts, you can transform even a 6-foot balcony into a productive growing area. The key is maximizing vertical space and optimizing sunlight exposure.
Whether you’re growing herbs on a windowsill or veggies on a patio, these layouts help you grow more without taking up more room.
I’ve tested these designs in my own urban garden, and they’ve helped me grow 30% more plants in the same footprint. The best part? All of these setups are adjustable, so you can tweak them based on your space, sunlight, and plant needs.
Let’s dive into the top 5 layouts that work for balconies, patios, and even indoor setups.
-
Vertical Stacking Tower
Stack 3-5 buckets with drainage holes aligned to create a tower. Use succulents or herbs like basil or thyme, which thrive in shallow roots. Add a drip irrigation system to water all levels evenly. -
Tiered Shelf System
Install floating shelves or a DIY pallet rack to hold buckets at different heights. Perfect for leafy greens (lettuce, spinach) or compact veggies (peppers, cherry tomatoes). Rotate shelves weekly for even sunlight. -
Hanging Bucket System
Suspend buckets from a balcony railing or pergola using heavy-duty straps. Ideal for trailing plants (strawberries, nasturtiums) or shallow-rooted herbs (parsley, cilantro). Ensure buckets have secure drainage to avoid spills. -
Wall-Mounted Bucket Grid
Attach buckets to a pegboard or trellis on a wall or fence. Great for climbing plants (beans, cucumbers) or compact bushes (bush beans, peppers). Use LED grow lights if sunlight is limited. -
Modular Rolling Cart
Assemble a mobile cart with wheels to hold 4-6 buckets. Move it to follow the sun or protect plants from wind. Best for seasonal crops (radishes, green onions) or container-friendly veggies (zucchini, eggplant).
For vertical stacking, I recommend using 5-gallon buckets with handles for easy moving. Drill drainage holes in the bottom and line them with landscape fabric to prevent soil from washing out. Place the tallest buckets in the sunniest spot and shorter ones in partial shade if needed.
If you’re working with a small balcony, the tiered shelf system is a game-changer. I use IKEA Kallax shelves with custom-cut holes for bucket drainage. This setup lets me grow 12 plants in just 4 square feet—perfect for herbs and salad greens.
Just remember to rotate the shelves every few days for even growth.
For hanging buckets, choose lightweight materials like fabric grow bags or plastic buckets with handles. I hang mine from a balcony railing using S-hooks and bungee cords for flexibility.
This layout is ideal for fast-growing plants like basil or lettuce, which you can harvest in as little as 30 days.
Don’t overlook the wall-mounted grid if you have a blank wall or fence. I attached wooden crates to my fence and filled them with self-watering buckets for peppers and eggplants.
This keeps the ground clear and makes it easy to access plants from any angle. Just ensure your wall can support the weight—especially after watering!
Finally, a modular rolling cart is my go-to for flexibility. I built mine from an old tool cart and added casters for mobility.
This lets me move my tomatoes and cucumbers to the sunniest spot by 10 AM and back to shade by 3 PM. It’s also great for winterizing plants by rolling them into a garage or covered patio.