
How To
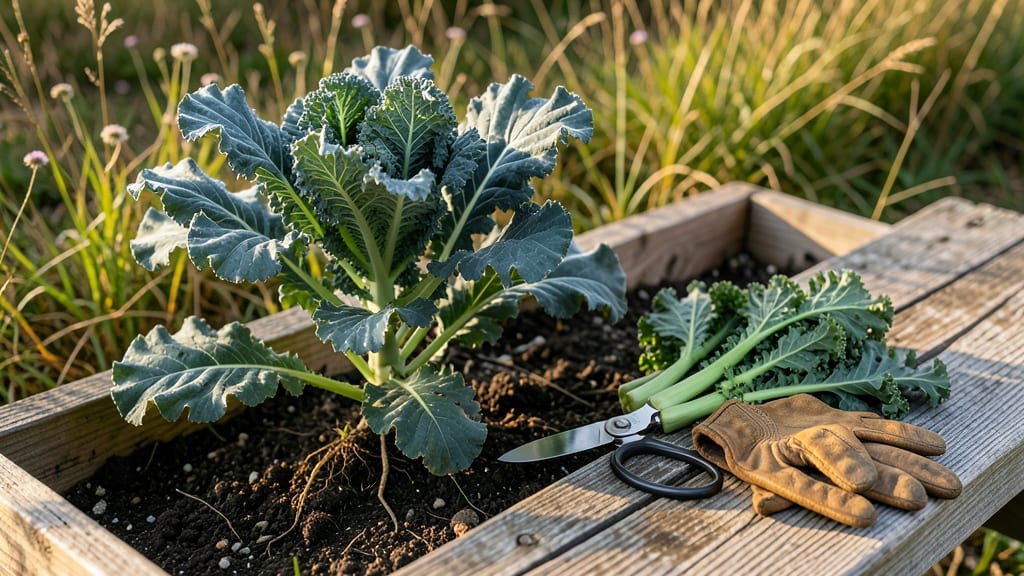
To pick kale from your garden at its tender peak, focus on the leaf-curling test and timing—this simple trick saves you from bitter, tough harvests.
Ever pulled a leaf only to find it too woody or already bolting? That’s a classic sign you missed the window. The secret is in the stem’s firmness and the leaf’s slight curl—when they’re just right, you’ve got crisp, sweet kale ready for the table.
You don’t need fancy tools to harvest kale correctly, but knowing when and how to cut makes all the difference. Whether you’re harvesting whole leaves or using the cut-and-come-again method, timing is everything to keep your plants producing well into fall.
In this guide, I’ll walk you through the exact steps to test your kale’s readiness, the best tools to use, and how to store your harvest so it stays fresh longer. Let’s get started!


The leaf-curling test: how to identify perfectly ripe kale
Kale is one of those versatile garden superstars that rewards patience with peak flavor and texture. But timing your harvest is everything—pick too early, and you get baby greens with mild flavor; wait too long, and you’re left with bitter, tough leaves.
The secret? Mastering the leaf-curling test, a simple trick that tells you exactly when your kale is ready to harvest.
This test works for all kale varieties, whether you’re growing curly kale, lacinato (dinosaur) kale, or red Russian kale. The key is understanding how the leaves curl naturally as they mature—a sign they’ve reached their sweet spot for harvest.
Let’s break down the exact cues to look for and why they matter.
⚠️ callout warning ⚠️
Leaving kale in the ground too long triggers bitterness and toughness due to lignification—a natural hardening of plant tissues. Once leaves start yellowing at the edges or feel woody when pinched, they’re past their prime. Harvest before this happens!
🌱 Pro Tip: For continuous harvests, pick outer leaves first and leave the inner leaves to keep growing.
The leaf-curling test starts with a simple touch. Gently pinch a middle-sized leaf (not the smallest or largest) and observe how it responds to pressure. A perfectly ripe kale leaf will curl slightly inward when you apply gentle pressure—almost like a tightly rolled scroll.
This curl indicates the leaf has reached its ideal moisture and fiber balance.
Next, check the color intensity. Curly kale should be a deep, glossy green, while lacinato kale will have rich, bluish-green hues. Red Russian kale, on the other hand, should show vibrant purple or red streaks.
Dull or faded colors mean the leaf is over-mature or stressed.
Don’t overlook the stem firmness. Run your thumb along the leaf stem near the base. It should feel thick and slightly springy, like a fresh celery stalk.
If the stem is thin or hollow-sounding, the leaf is past its peak. A woody stem is a red flag—your kale has overstayed its welcome in the garden.
Timing matters too. For spring-planted kale, aim to harvest 60-80 days after transplanting, while fall-planted varieties often reach readiness in 50-70 days. Cold weather actually improves flavor, so late-season kale (after a light frost) can be sweeter and more tender.
Just avoid harvesting after hard freezes, which can damage the plant.
For cut-and-come-again harvesting, focus on selective leaf removal. Use a sharp pair of pruning shears or your fingers to snip or twist off leaves at the base. Leave at least half the plant intact to ensure regrowth.
This method works best for younger plants—once kale bolts (sends up a flower stalk), it’s time to harvest the whole plant.
If you’re growing multiple kale varieties, pay attention to their unique maturity rates. Red Russian kale often matures 10-15 days faster than lacinato kale, while curly kale tends to be the most slow-growing. Monitor each variety separately to avoid missing the optimal harvest window.
Once you’ve mastered the leaf-curling test, you’ll never struggle with under- or over-harvesting kale again. The result? Crisp, flavorful leaves that shine in salads, sautés, or raw snacks. And the best part? Your kale plant will keep producing for weeks if you harvest responsibly. Happy harvesting!
Best practices for harvesting kale without damaging the plant
Harvesting kale the right way keeps your plants healthy and productive for weeks. The key is using the cut-and-come-again method—this means harvesting outer leaves while leaving the inner growth intact. When done correctly, your kale will regrow, giving you a steady supply all season long.
Timing matters too. Fall harvests (October-November) yield the sweetest leaves, while spring harvests (April-May) produce tender young growth. Winter harvests are possible in mild climates, but leaves may taste slightly bitter after frost. Always check weather forecasts—harvest before hard frosts hit!
How to Pick Kale From Garden
-
1Choose your tools: Use clean pruning shears for thick stems or your fingers for tender leaves. Sterilize tools with rubbing alcohol to prevent disease spread.
-
2Locate the outer leaves: Start with the largest, mature leaves (6+ inches) on the plant's perimeter. These are ready for harvest while protecting the center growth.
-
3Cut at the base: Make a clean cut 1-2 inches above the main stem using a slight angle. This prevents water from pooling and causing rot.
-
4Harvest frequency: Pick leaves every 1-2 weeks during peak growing season. In cooler months, extend this to every 3 weeks to avoid stressing the plant.
-
5Check conditions: Harvest on cool, cloudy mornings when leaves are crisp. Avoid harvesting after rain or when soil is waterlogged—this makes leaves bitter.
Never harvest more than one-third of the plant at once. Over-harvesting stresses kale and can lead to bolting (flowering prematurely), which makes leaves bitter and tough. If your plant looks sparse after harvest, it’s time to fertilize with a balanced 10-10-10 mix to encourage new growth.
Seasonal adjustments are crucial. In fall, harvest frequently to beat frost, while in spring, focus on young leaves for the tenderest texture. Always check soil moisture before harvesting—well-watered plants yield sweeter leaves. A quick finger test (1-2 inches deep) should feel damp but not soggy.
Store harvested kale properly to extend its shelf life. Wrap leaves in a damp paper towel and place them in a perforated plastic bag in the fridge. This mimics the plant's natural humidity and keeps leaves crisp for up to 10 days.
For long-term storage, blanch and freeze leaves for up to 6 months of flavorful harvests.