
Picking
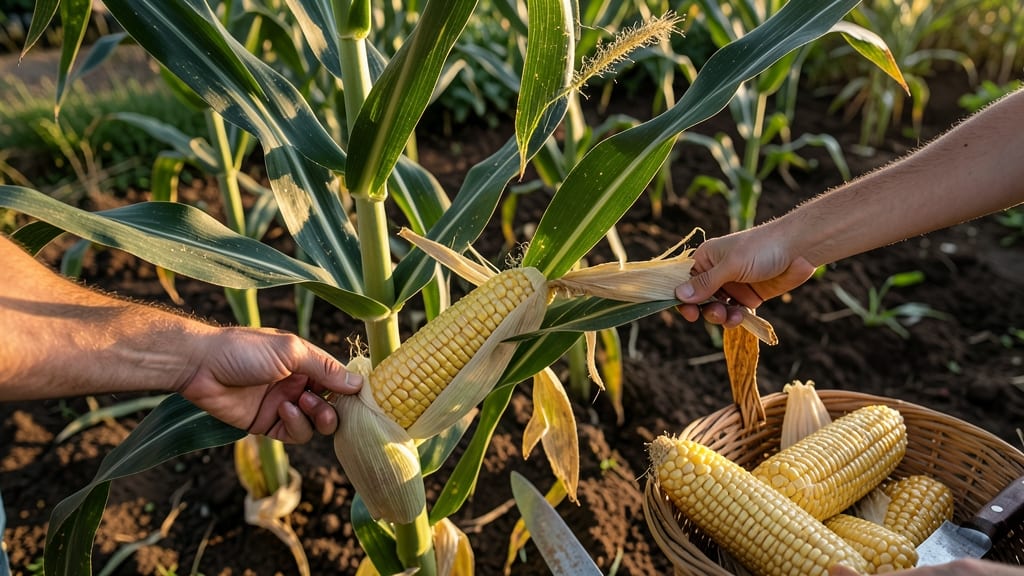
Picking corn at the right time ensures the sweetest, juiciest ears straight from your garden 🌽—and missing that window means tough, starchy kernels that taste more like disappointment than dinner.
Most gardeners wait for the silks to brown, but that’s just the beginning. The milk stage—when kernels ooze a creamy liquid when pierced—is the true test of perfect ripeness. One wrong move, and you’ll end up with ears that are either too hard or too soft, ruining your harvest.
In this guide, I’ll walk you through the foolproof way to spot the milk stage, from checking kernel color to testing firmness, so you never guess again. You’ll also learn how temperature and daylight affect timing and what to do if you pick too early or too late.
By the end, you’ll know exactly when to twist those ears from the stalk for corn so sweet, it’ll taste like summer in every bite—no overripe regrets included.


How to identify the milk stage in sweet corn for perfect harvest timing
Sweet corn reaches its peak flavor when harvested at the milk stage, a term that describes the ideal moment when kernels are tender and packed with natural sugars. This stage occurs roughly 21–28 days after pollination, but visual cues are far more reliable than counting days.
The milk test—a simple but foolproof method—helps you determine if your corn is ready to pick. If you miss this window, you risk ears that are either underripe and watery or overripe and starchy, both of which compromise that sweet, buttery taste we all love.
The milk stage isn’t just about kernel development—it’s also tied to the silk drying process and husk condition. When silks turn from bright green to brown and crispy, it’s a clear sign that pollination has occurred and kernels are filling out.
However, don’t rely solely on silks; some varieties may dry out faster than others. Instead, combine three key indicators—silk color, husk tightness, and kernel firmness—to confirm readiness. Ignoring these cues often leads to missed harvest windows, leaving you with ears that lack sweetness or texture.
Here’s the secret: the milk stage is named for the milky liquid that oozes from a kernel when you pierce it with your fingernail. This liquid is a sugar-rich sap that disappears as the corn matures into starch.
To test, peel back the husk on an ear and press your nail into a kernel. If a clear, milky liquid appears, your corn is at peak ripeness. If the kernel is hard and dry, it’s past its prime, while a watery or translucent liquid means it’s still underripe.
This test takes just seconds but saves you from harvesting corn that’s too early or too late.
🌽 Key Takeaway: When to Pick Corn from Garden
One of the most common mistakes gardeners make is overestimating the harvest window. Sweet corn can go from perfectly tender to woody and starchy in just 24 hours, especially in hot weather. To avoid this, check your corn every 2–3 days once silks brown.
Early morning is the best time to harvest because cool temperatures help preserve sugars in the kernels. If you’re unsure, err on the side of picking slightly early—corn continues to sweeten slightly after harvest, but overripe ears won’t recover their flavor.
Not all corn varieties reach the milk stage at the same time, so pay attention to your specific sweet corn type. Super sweet varieties (like 'Silver Queen' or 'Ambrosia') tend to have a shorter harvest window, while standard sweet corn (like 'Country Gentleman') may stay tender a bit longer.
If you’re growing multiple varieties, label your plants and check them individually for ripeness. Pro tip: Keep a small notebook by your garden to track when each ear was pollinated—this helps you predict when to look for the milk stage.
This small effort can mean the difference between buttery perfection and bland disappointment.
The husk is another underutilized indicator of corn ripeness. When your corn is ready, the husk should pull back easily with minimal resistance, revealing plump, evenly colored kernels. If the husk is tight and difficult to remove, the corn is likely still developing.
Conversely, if the husk peels back too easily and kernels look shriveled, the ear is overripe. This visual cue is especially useful for larger ears or bushier plants, where testing every kernel with your nail isn’t practical.
Always combine husk condition with the milk test for the most accurate results.
Environmental factors like temperature and daylight also influence when your corn reaches the milk stage. In hot climates or late summer, corn matures faster, so you may need to check it daily to catch the sweet spot.
Conversely, in cooler regions or early season, the harvest window stretches out, giving you more flexibility. If you notice your corn silks drying out unevenly across the plant, it could signal uneven pollination, often caused by wind or poor tassel development.
In this case, focus on harvesting the ears that show the most promising signs of ripeness first.
Once you’ve confirmed the milk stage, act quickly to harvest your corn. Use a sharp knife or pruners to cut the stalk about 6 inches below the ear, or grip the ear firmly and twist it gently until it snaps cleanly.
Avoid pulling the husk back too far before harvest—this exposes the ear to sunlight and drying, which can turn sweet corn starchy in minutes. After picking, store corn in the refrigerator (not the countertop) to slow down the conversion of sugars to starch.
With proper timing, your homegrown corn will taste sweeter and more vibrant than anything from the store.
If you’re still unsure whether your corn is ready, try the taste test as a final check. Pierce a kernel and taste a small amount—if it’s sweet and tender with a creamy texture, you’ve nailed the milk stage. If it’s bitter or crunchy, it’s past its prime.
This method is especially helpful for new gardeners or picky eaters in your household. Remember, the milk stage is a brief window of opportunity, so stay vigilant and enjoy the reward of perfectly timed, homegrown sweet corn that’s bursting with flavor.
Best practices for picking corn at the ideal milk stage
Once you’ve spotted the milk stage in your corn, the next step is harvesting with precision. The way you pick—whether you twist or cut—can make all the difference in preserving that sweet flavor.
I’ve learned the hard way that a quick snip too early or a rough twist can damage the plant and reduce future yields, so I now follow a three-step method that ensures clean, stress-free harvests every time.
Timing matters too: in hot climates like Zone 9, corn can go from perfect to starchy in just 24 hours, while cooler regions like Zone 5 give you a 48-hour window.
I always check the weather forecast before harvesting—if a heatwave is coming, I prioritize picking my best ears first. Even the time of day plays a role; morning harvests keep the corn crisp longer, while afternoon heat can speed up staling.
Step-by-Step Guide to Harvesting Sweet Corn at Milk Stage
-
Step 1: Choose the Right Ear
Select ears that are plump, firm, and 4–8 inches long. Look for husks that pull back easily to reveal deep-colored kernels. Avoid ears with dried-out tips or shriveled husks. -
Step 2: Test the Milk Stage
Pierce a kernel with your fingernail. If a milky liquid oozes out, it’s ready. If the kernel is hard or translucent, wait 1–2 days. If it’s too soft or mushy, you’ve missed the window. -
Step 3: Harvest with Care
Use one of two methods: twist sharply at the base (preferred for large ears) or cut stalks with clean shears 2 inches below the ear. Twisting is gentler on the plant and encourages secondary ears to form. -
Step 4: Handle Post-Harvest
Remove outer husks but leave the inner husk intact to preserve moisture. Store in the fridge (not freezer) for up to 3–5 days or cook immediately for peak sweetness. For long-term storage, blanch and freeze whole ears. -
Step 5: Adjust for Climate
In hot, dry climates, harvest daily or every other day to avoid staling. In cooler regions, a 2–3 day window is safe. Always prioritize morning harvests to beat the heat.
After harvesting, I always give my corn a quick cooling rinse under cold water to remove any dirt or silk residue. This not only keeps the ears clean but also helps maintain their crispness.
If you’re planning to cook the corn right away, I recommend boiling it for just 4–5 minutes—any longer, and you’ll lose that fresh-picked sweetness.
One mistake I see often is leaving harvested corn sitting in the sun. Even a 30-minute delay can turn sweet kernels into starchy ones. I keep a cool, shaded bucket nearby while harvesting to hold ears until I’m ready to cook or store them.
For large gardens, consider harvesting in batches of 10–12 ears to avoid overcrowding.
Finally, don’t forget to rotate your harvests if you’re growing multiple varieties. Some corn, like 'Silver Queen', matures faster than others, so I always plant successive batches every 2 weeks for a continuous harvest.
This way, I enjoy fresh, sweet corn straight from the garden for weeks—no sad, overripe leftovers in sight.