Landscaping
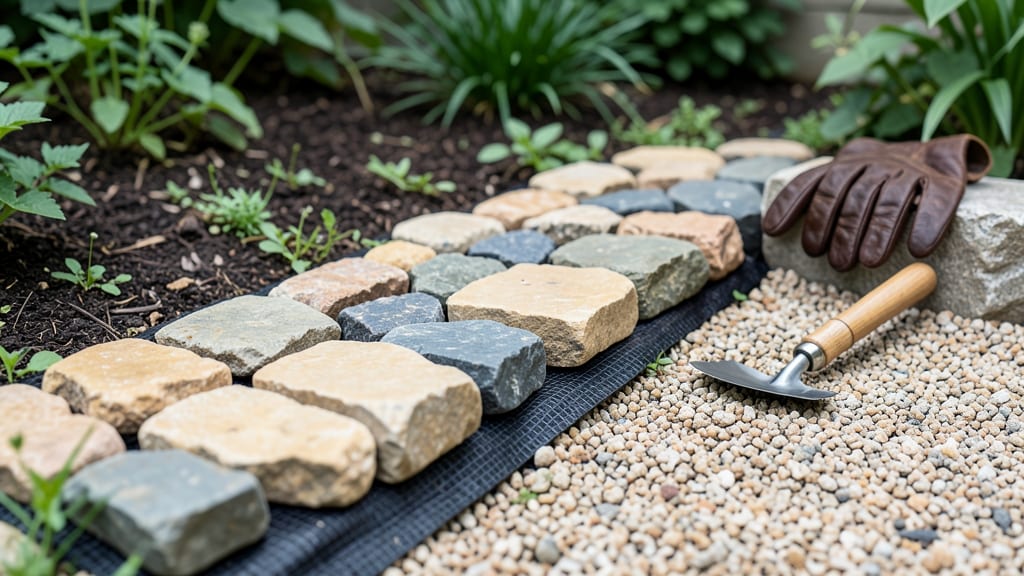
Cobble garden edging creates a natural, durable border by digging a trench, laying a base of landscape fabric, and securing rounded stones with sand or mortar. Choose stones 2-3 inches in diameter for stability and aesthetic appeal.
This rustic yet refined border solution works because the rounded stones distribute weight evenly while the fabric prevents weeds from growing through. 🌿 The key to longevity lies in proper preparation—skipping the fabric layer can lead to soil erosion and uneven settling over time.
I’ve found that granite cobbles hold up best in freeze-thaw climates, while slate offers a more uniform look for formal gardens.
For best results, dig your trench about 4-6 inches deep and 12-18 inches wide, depending on stone size. The wider base gives you more flexibility when arranging the stones, especially around curves or garden features.
A rubber mallet helps settle larger stones without cracking them, while a level ensures your border stays perfectly straight.
💡 In This Article
- Selecting and Preparing Cobble Stones for Garden Edging
- Step-by-Step Installation Guide for Cobble Edging
Selecting and preparing cobble stones for garden edging
The right cobble stones make all the difference in durability and appearance. For garden edging, aim for stones between 2-3 inches in diameter—they’re large enough to stay put but small enough to create a natural, flowing border.
Rounded cobbles distribute weight better than jagged stones, reducing erosion risks over time. Slate cobbles offer a sleek, uniform look ideal for formal gardens, while granite provides rugged durability perfect for high-traffic areas or freeze-thaw climates.
When selecting materials, consider how weather affects your stones. Granite resists cracking from temperature shifts, making it ideal for northern climates, while limestone offers a softer aesthetic but may require sealing. Always test stability by placing a stone on a flat surface—if it wobbles, it’s too small or uneven.
The trench should be 4-6 inches deep to accommodate the stone’s depth plus a 2-inch base layer of compacted gravel for drainage and support.
Proper preparation prevents long-term headaches. Start by marking your border with stakes and string to ensure straight lines, especially around curves. The trench width should be 1.5 times the stone diameter—so a 3-inch stone needs a 4.5-inch wide trench—to allow for easy placement and adjustments.
Skimping here leads to uneven settling or stones popping up over time.
Erosion prevention is where the fabric comes into play. Landscape fabric acts as a barrier between soil and stones, blocking weeds while allowing water drainage. Use a heavy-duty fabric (3-5 oz per sq yd) and overlap seams by 6 inches to avoid gaps.
For extra stability in sloped areas, anchor the fabric with landscape staples before adding stones.
One common mistake is ignoring the base layer. Without compacted gravel, stones sink unevenly, creating a wavy border. Rent a plate compactor or use a hand tamper to achieve a firm, level base. This step is especially critical in clay-heavy soils, where moisture expansion can push stones upward. 💫
For a polished finish, arrange stones in a staggered pattern—this mimics natural stone formations and adds visual interest. Leave 1/4-inch gaps between stones for sand or adhesive, which locks them in place and prevents shifting. In high-traffic areas, consider using a concrete adhesive instead of sand for added stability.