
Advice
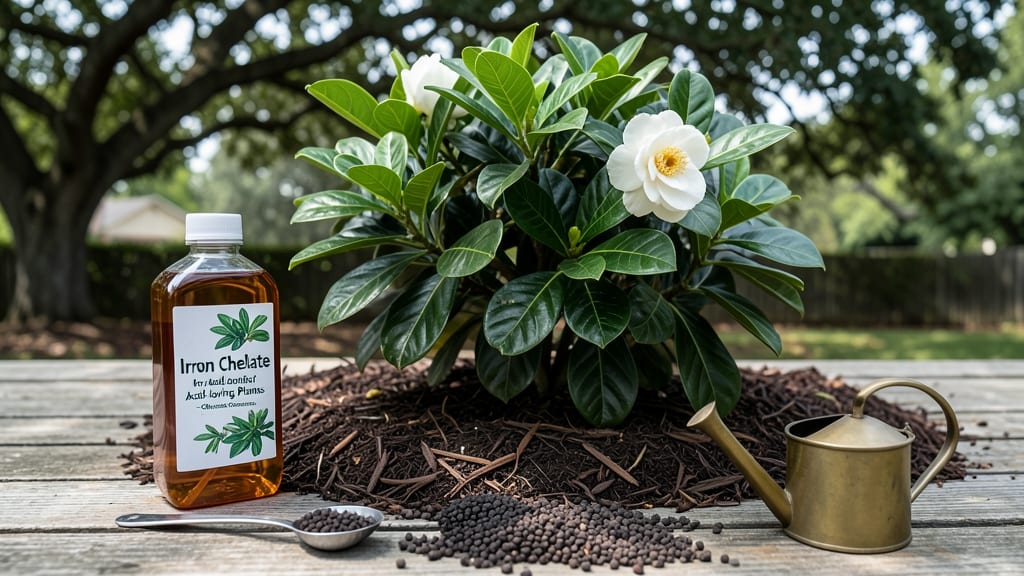
Iron deficiency in gardenias 🌸 is the silent killer of those glossy leaves and fragrant blooms you love — and the fix is simpler than you think.
Yellowing leaves, sparse blooms, or stunted growth in your gardenias? Iron deficiency might be the culprit—and fixing it could transform your plants into fragrant, vibrant showstoppers.
Most gardeners overlook soil pH as the root cause, but a simple adjustment can make all the difference. Gardenias thrive in acidic soil (pH 5.0–6.0), and when iron becomes locked out due to alkaline conditions, even the hardiest plants struggle.
In this guide, I’ll walk you through diagnosing the problem, the best iron supplements (organic vs. synthetic), and long-term soil care to keep your gardenias lush and blooming for years.
How to diagnose and fix iron deficiency in gardenias
If your gardenias are showing yellowing leaves with green veins, you’re likely dealing with iron chlorosis—a common issue for these acid-loving plants. This deficiency stunts growth and reduces blooms, but the good news? It’s often reversible with the right approach.
Iron deficiency thrives in alkaline soils (pH 7.0+), which lock out this essential nutrient. My gardenias once suffered from this, but after adjusting their care, they now burst with fragrant white blooms year after year.
First, confirm the issue by checking for interveinal chlorosis, where leaves turn yellow between veins while veins stay green. New growth may appear pale or stunted. Since gardenias thrive in acidic soil (pH 5.0–6.0), a simple soil test can reveal if your garden’s pH is too high.
Without intervention, iron deficiency worsens, leading to leaf drop and fewer flowers. The key to revival lies in lowering pH and supplying iron in a plant-available form.
Comparison Table: Iron Deficiency Fixes for Gardenias
| Solution | How It Works | Best For | Application Method |
|---|---|---|---|
| Chelated Iron | Binds iron for easy uptake; works in alkaline soils | Severe deficiency, fast results | Foliar spray or soil drench (every 2–4 weeks) |
| Epsom Salt (Magnesium Sulfate) | Provides magnesium + minor iron boost; lowers pH slightly | Mild deficiency, organic approach | 1 tbsp per gallon of water (soil drench monthly) |
| Sulfur or Elemental Sulfur | Lowers soil pH over time, releasing locked iron | Chronic alkaline soil issues | Work into soil (1 lb per 100 sq ft, spring/fall) |
| Iron Sulfate | Quick iron fix but can raise pH; use sparingly | Emergency treatment | Soil drench (½ tsp per gallon, monthly) |
| Compost + Pine Needles | Organic matter + natural acidifier; improves soil structure | Long-term prevention, organic gardens | Top-dress annually (2–3 inches) |
For immediate results, I recommend starting with chelated iron, which is pre-bound to organic molecules for instant uptake. Mix a foliar spray (1 tsp chelated iron per gallon of water) and apply it to leaves in the early morning or evening to avoid leaf burn.
Repeat every 2–4 weeks until you see new green growth. If your soil is highly alkaline, pair this with elemental sulfur to gradually lower the pH over 2–3 months.
Organic gardeners often turn to Epsom salt (magnesium sulfate) as a quick fix. Dissolve 1 tablespoon per gallon of water and water the soil thoroughly. While Epsom salt won’t replace iron directly, it supports overall plant health and may help if magnesium deficiency is contributing to the issue.
For a dual approach, combine it with composted pine needles, which naturally acidify the soil over time.
Monitor your gardenias closely after treatment. Healthy new leaves should emerge within 4–6 weeks. If yellowing persists, test your soil again—sometimes calcium or manganese deficiencies mimic iron chlorosis.
Avoid over-fertilizing with nitrogen, as this can worsen nutrient imbalances. Instead, focus on balanced fertilization (like a 10-10-10 formula) to support overall vitality.
Prevention is key! Amend your soil annually with peat moss or compost to maintain acidity. Mulch with pine bark or oak leaves to keep the pH in check. I’ve found that gardenias planted in raised beds with acidic soil mixes rarely suffer from iron issues.
If your yard’s soil is naturally alkaline, consider container gardening with a well-draining, acidic potting mix for better control.
When in doubt, consult a local soil testing lab—they’ll provide exact pH and nutrient levels. For severe cases, a professional arborist can diagnose underlying issues like root rot or compacted soil. With the right adjustments, your gardenias will reward you with luxuriant foliage and intoxicating blooms all season long.
🌿 Remember: Patience is key—some iron deficiencies take 8–12 weeks to fully correct. Stick with your treatment plan, and your gardenias will thank you with vibrant, fragrant blooms that’ll make your garden the envy of the neighborhood. 🌸
Best iron supplements for gardenias: organic vs. synthetic options
When your gardenias show signs of iron deficiency—like yellowing leaves with green veins—it’s time to act. The right iron supplement can restore health and encourage those prized fragrant blooms. But with so many options, how do you choose?
Let’s break down the best organic vs. synthetic iron sources for your gardenias, including their pros, cons, and how to apply them effectively.
Iron supplements come in two main categories: synthetic (like iron sulfate or chelated iron) and organic (like Epsom salt or compost). Each has unique benefits and drawbacks, especially for acid-loving gardenias.
Synthetic options act quickly but may disrupt soil chemistry, while organic options are gentler but slower to show results. The right choice depends on your plant’s needs and your gardening approach.
Iron Supplement Comparison for Gardenias
- Pros: Fast-acting, affordable, widely available
- Cons: Can lower soil pH, may burn roots if overused
Application: Mix 1 tsp per gallon of water, apply to soil (not leaves). Reapply every 4-6 weeks.
- Pros: pH-stable, absorbed quickly, less risk of toxicity
- Cons: More expensive than iron sulfate
Application: Follow label rates (typically 1-2 tbsp per 5 gallons of water). Spray on soil or foliage monthly.
- Pros: Gentle, improves magnesium levels, safe for most plants
- Cons: Slow to show results, may need frequent reapplication
Application: Dissolve 1 tbsp in 1 gallon of water. Water soil monthly during growing season.
- Pros: Improves soil structure, long-term solution, no risk of overapplication
- Cons: Takes time to release iron, not ideal for immediate fixes
Application: Mix 2-3 inches of compost into topsoil annually. Pair with foliar sprays for faster results.
For immediate results, synthetic options like chelated iron are your best bet. They’re designed to bypass soil pH issues and deliver iron directly to your gardenia’s roots.
However, if you prefer a gentler, long-term approach, organic amendments like compost or Epsom salt will gradually improve soil health while providing essential nutrients.
Always test your soil’s pH first—gardenias thrive in acidic soil (pH 5.0-6.0), and alkaline conditions can lock out iron, no matter how much you supplement.
When applying any iron supplement, follow the dosage instructions carefully. Overapplication can lead to iron toxicity, which causes brown leaf edges or stunted growth. For liquid supplements, water the soil thoroughly after application to help distribute the iron evenly.
If you’re using foliar sprays, apply in the early morning to avoid leaf burn from afternoon sun.
Pro tip: Combine iron supplements with a light acidifying fertilizer (like one formulated for azaleas or rhododendrons) to maintain optimal soil conditions. This two-pronged approach ensures your gardenias get both the iron they need and the right environment to absorb it efficiently.
With the right supplement and consistent care, your gardenias will reward you with lush foliage and abundant blooms all season long.
🌸