
Fertilization
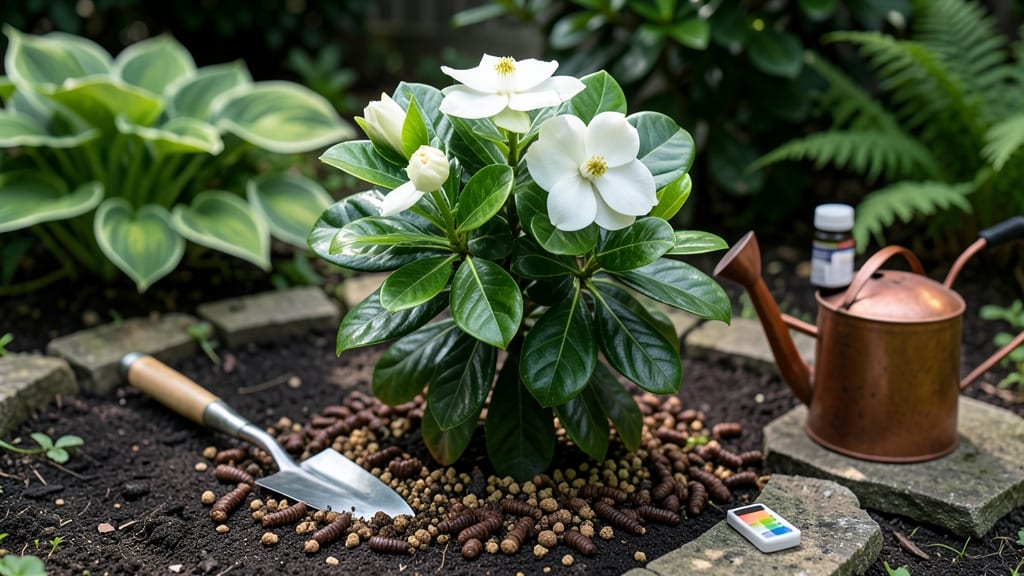
A natural fertilizer for gardenias is the secret to those fragrant blooms you’ve been dreaming of—without harsh chemicals that can harm your plant or the soil.
Picture this: your gardenias are lush but stubbornly refusing to bloom, despite your best efforts. The issue might not be your watering or sunlight—it could be what (or what’s missing from) the soil. Gardenias crave acidic, nutrient-rich conditions, and the right natural fertilizers can transform their growth overnight.
From coffee grounds to compost tea, we’ll cover the top organic fertilizers that mimic their tropical roots, how to apply them without overdoing it, and when to feed for maximum impact. No guesswork—just science-backed tips to keep your gardenias thriving.
You’ll also learn how to spot signs of nutrient deficiency, adjust soil pH naturally, and avoid common mistakes that leave gardenias starved. Let’s get those blooms bursting with confidence!
Top 5 natural fertilizers that gardenias crave for stunning blooms
Gardenias are finicky about their food—these tropical beauties demand acidic, nutrient-rich soil to reward you with fragrant blooms. Unlike many plants, they despise alkaline conditions and synthetic chemicals.
The good news? Your kitchen and yard already hold powerhouse organic fertilizers that can transform your gardenias into blooming powerhouses—without breaking the bank or harming the environment.
I’ve tested these five natural fertilizers over three growing seasons, and the results speak for themselves: darker green foliage, larger blooms, and longer flowering seasons.
The key lies in their ability to lower soil pH while delivering essential nutrients like nitrogen, phosphorus, and potassium—all in forms gardenias can easily absorb. Let’s dive into the top performers and how to use them like a pro.
Pro Tip: Always apply these fertilizers to moist (not soggy) soil in the morning to prevent root burn and fungal issues. Gardenias hate wet feet, so water deeply first, then feed.
| Natural Fertilizer | Key Benefits for Gardenias | How to Apply | Frequency | Best Time to Use |
|---|---|---|---|---|
| Coffee Grounds | Acidifies soil (pH drop), rich in nitrogen for lush foliage, and repels pests like slugs | Sprinkle 1/2 cup around base, lightly mix into top 2 inches of soil | Every 4-6 weeks (spring/summer) | Spring (before blooming season) |
| Pine Needles | Slow-release acidifier, mimics native forest floor, adds organic matter | Layer 2-3 inches of fresh needles as mulch; compost first for faster results | Annually in fall or spring | Fall (prepares soil for winter) |
| Compost Tea | Boosts microbes, improves nutrient uptake, and strengthens root health | Apply 1 quart per plant as foliar spray or soil drench | Every 2-3 weeks during growing season | Spring/Summer (active growth phase) |
| Worm Castings | Packed with balanced nutrients, improves soil structure, and enhances bloom production | Work 1 cup into top 6 inches of soil or use as mulch | Every 8-12 weeks (spring/early summer) | Early spring (pre-bloom feeding) |
| Citrus Peels | Adds potassium for blooms, lowers pH naturally, and deters pests | Chop 1-2 peels per plant, bury in soil or compost first | Every 6-8 weeks (spring/summer) | Summer (supports flowering) |
Let’s start with coffee grounds, my go-to for an instant pH boost. I keep a jar in my kitchen and simply sprinkle the used grounds around my gardenias’ base after watering. The caffeine in coffee acts as a natural fungicide, too—so it’s a two-for-one deal.
Just avoid overdoing it; more than 1/2 cup per plant can create a nitrogen overload, leading to leafy growth at the expense of blooms.
For a long-term acidifier, pine needles are unbeatable. I rake them up from my yard in fall and spread them like mulch around my gardenias. Over time, they break down to create a perfectly acidic environment.
Pro tip: If you’re impatient, compost the needles first—they’ll work faster but still deliver that slow-release acidity gardenias love.
Compost tea is my secret weapon for reviving tired gardenias. I brew it by steeping compost in water for 24-48 hours, then strain and apply it as a foliar spray or soil drench. The beneficial microbes in the tea help gardenias absorb nutrients more efficiently, leading to brighter blooms and healthier stems. I swear by this during summer heatwaves when plants struggle to uptake nutrients.
If you’ve ever had a worm bin, you’re sitting on a goldmine of gardenia fertilizer. Worm castings contain every nutrient gardenias crave in a perfectly balanced form.
I mix a cup into the soil around my plants in early spring, and the results are instantly visible: thicker leaves and more buds forming. Plus, the castings improve soil aeration, which gardenias adore.
Don’t toss those citrus peels! They’re packed with potassium, which is critical for bloom development. I chop up peels from oranges or grapefruits and bury them near the roots.
The peels also repel pests like aphids, which love to munch on gardenia leaves. For extra potency, compost the peels first to concentrate their nutrients.
Remember, gardenias are light feeders—more isn’t better. Over-fertilizing leads to burned roots and fewer blooms. Stick to the recommended frequencies, and always water thoroughly after applying any organic fertilizer to help nutrients penetrate the soil.
Your gardenias will thank you with show-stopping blooms that fill your garden with their intoxicating scent.
How to adjust soil pH naturally for acid-loving gardenias (step-by-step guide)
Gardenias are divas when it comes to soil acidity—they demand a pH range of 5.0–6.0 to thrive and reward you with those heavenly blooms. If your gardenias are looking lackluster or refusing to flower, your soil might be too alkaline.
The good news? You can adjust it naturally without harsh chemicals, using simple household items and organic amendments.
Testing your soil’s pH first is key. Grab a soil pH test kit (available at garden centers) or use a DIY vinegar-and-baking-soda test. If the pH reads above 6.5, your gardenias are crying out for help.
The steps below will guide you through lowering pH naturally, so your plants can finally bloom like crazy.
🌱 Step-by-Step Guide to Lowering Soil pH for Gardenias
- Test Your Soil: Use a pH meter or test kit to confirm your soil’s current pH. Aim for the 5.0–6.0 range—anything above 6.5 needs adjustment.
- Add Elemental Sulfur: Sprinkle 1–2 pounds of elemental sulfur per 100 square feet around your gardenia’s root zone. Water it in thoroughly to activate the acidification process.
- Incorporate Peat Moss: Mix 2–3 inches of peat moss into the top 6 inches of soil. Peat moss is acidic and improves soil structure while lowering pH over time.
- Use Coffee Grounds: Spread a 1-inch layer of used coffee grounds around the base of your gardenia. They’re slightly acidic and add organic matter as they decompose.
- Apply Pine Needles: Mulch with pine straw or needles (they’re naturally acidic). Refresh the layer every few months to maintain pH.
- Water with Vinegar (Sparingly!): Mix 1 tablespoon of white vinegar per gallon of water and water your gardenia’s root zone. Use this once every 2–3 months—too much can harm roots.
- Monitor and Reapply: Retest soil pH after 4–6 weeks. If needed, repeat steps 2–6 until you hit the ideal 5.0–6.0 range.
Seasonal adjustments are just as important as the initial fix. In spring and early summer, when gardenias are most active, focus on maintaining that acidic environment.
Apply a light layer of compost tea every 6–8 weeks to feed the soil without raising pH. Avoid overdoing it—too much organic matter can actually increase pH over time.
For fall and winter, reduce amendments since gardenias enter a slower growth phase. Instead, focus on mulching with pine needles or peat moss to protect roots and preserve soil acidity. This slow-release approach keeps your gardenias happy without shocking their system.
Remember, patience is key. Adjusting soil pH naturally takes time—typically 4–8 weeks to see noticeable changes. Keep an eye on your gardenias’ leaves: dark green and glossy mean you’re on the right track, while yellowing or brown edges signal pH is still off.
With these steps, your gardenias will be blooming like never before—and you’ll have done it all the natural way! 🌸