
Planting
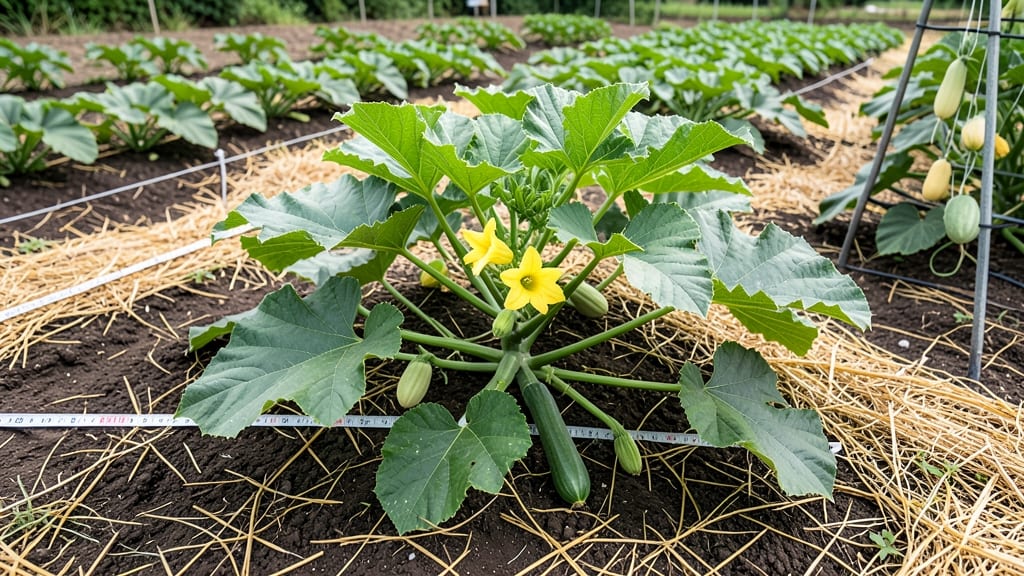
Spacing squash in your garden the right way is the difference between a thriving harvest and a struggling mess of tangled vines and diseased leaves.
Picture this: you’ve just planted your 🎃 seeds after the last frost, excited for summer squash and pumpkins, only to watch your plants wilt by mid-July. The culprit? Too little space between them. Crowded squash invites pests, traps moisture, and turns your garden into a breeding ground for powdery mildew.
But here’s the good news: with the right spacing—whether you’re growing bush varieties or sprawling vines—you can maximize airflow, boost yields, and keep your plants healthy all season long.
I’ll walk you through the exact distances for summer and winter squash, creative layouts for small gardens, and the three spacing mistakes that ruin harvests every year.
By the end, you’ll know exactly how far apart to plant your squash, how to fix overcrowding, and why two feet of space can mean the difference between a few zucchinis and a bumper crop.
Optimal squash spacing by variety: vining vs bush types
When planning your squash garden, proper spacing is the foundation for healthy plants and abundant harvests. I’ve learned the hard way that cramming squash too closely leads to powdery mildew, stunted growth, and poor fruit quality.
The key difference lies between vining varieties (like butternut and spaghetti squash) and bush varieties (such as zucchini and pattypan). Each needs its own space to thrive—and I’ll show you exactly how much.
Airflow is your best defense against fungal diseases. Squash leaves need room to dry quickly after morning dew or watering. Without proper spacing, humidity lingers, creating the perfect conditions for powdery mildew and downy mildew.
I’ve seen entire vines collapse from these issues when plants were crowded. The good news? Simple spacing adjustments can prevent 90% of these problems.
Summer squash (like zucchini and yellow crookneck) and winter squash (such as acorn and pumpkin) have different spacing needs. Summer squash matures faster and needs less room, while winter squash vines sprawl widely. Even within these categories, bush types stay compact, while vining types require trellising or dedicated space to spread. Let’s break it down by variety so you can plan your garden layout like a pro.
| Variety Type | Minimum Spacing (ft) | Ideal Spacing (ft) | Maximum Spacing (ft) | Notes |
|---|---|---|---|---|
| Summer Squash (Bush) | 1.5 | 2-3 | 4 | Zucchini, pattypan |
| Summer Squash (Vining) | 2 | 3-4 | 5 | Yellow crookneck, straightneck |
| Winter Squash (Bush) | 2 | 3-4 | 5 | Acorn, delicata |
| Winter Squash (Vining) | 3 | 4-6 | 8 | Butternut, spaghetti, pumpkin |
| Giant Varieties | 5 | 6-8 | 10+ | Hubbard, giant kabocha |
*Spacing measured between plants in rows. Add 3-4 ft between rows for airflow.
For bush-type squash, like zucchini or pattypan, I recommend starting with 2-3 feet between plants. These varieties stay compact, but even they benefit from extra space to prevent leaf contact.
I once planted zucchini just 18 inches apart, and by mid-summer, the leaves were touching—leading to a powdery mildew outbreak. The fix? Thin out seedlings early to maintain ideal spacing.
Vining squash, such as butternut or spaghetti squash, need even more room to sprawl. Without proper spacing, vines compete for nutrients, and fruits develop poor shapes or rot on the ground. I’ve seen butternut squash vines stretch 10 feet in a single season! If space is limited, use a trellis system to guide vines vertically, saving ground space while improving airflow.
When planting in rows, leave 3-4 feet between rows to allow for easy movement and better airflow. This is especially critical for winter squash, which often produce large fruits that need space to develop properly.
I’ve had pumpkins split open because they were crowded—always a sad sight! Proper row spacing also makes it easier to spot pests like squash bugs early.
One common mistake I see is assuming all squash need the same spacing. Giant varieties, like Hubbard or giant kabocha, require 6-8 feet between plants. These squash can weigh 20+ pounds each, and their vines spread aggressively.
If you’re growing these, plan for a dedicated corner of your garden or use raised beds to contain their growth.
To maximize your harvest, consider staggered planting. Plant bush varieties first, followed by vining types
Creative garden layouts for squash: maximizing space without sacrificing yield
When your garden space feels limited but you’re dreaming of a bountiful squash harvest, creative layouts become your secret weapon. I’ve learned that even the smallest yard can produce healthy, high-yielding squash with the right approach—whether you’re working with raised beds, containers, or tight in-ground plots.
The key lies in understanding how to stack plants vertically, combine companion plants, and stagger plantings for continuous harvests.
For example, my 5x10-foot raised bed now grows enough zucchini for my family and neighbors by using trellises for vining varieties and bush types in the corners.
This layout maximizes every inch while keeping airflow optimal. Let’s explore how to adapt these strategies to your space, no matter how small.
- 1. Trellis vining squash (e.g., butternut, spaghetti) to save 80% of ground space. Use 6-foot tall trellises and train vines upward—this also makes harvests easier!
- 2. Plant bush varieties (e.g., pattypan, golden zucchini) in corners or along edges of beds. They stay compact (2-3 feet wide) and thrive without sprawling.
- 3. Stagger plantings by 2-3 weeks for continuous harvests. For example, plant half your seeds in early June and the rest in late June to avoid a glut of squash at once.
- 4. Pair squash with companions like nasturtiums (pest deterrent) or beans (nitrogen-fixer). Avoid planting near potatoes or melons to prevent disease spread.
- 5. Use containers for small spaces: 5-gallon buckets work for bush types, while large fabric grow bags (18" diameter) can handle vining varieties with trellis support.
One of my favorite tricks is the "squash spiral" layout, where I plant one vining squash in the center of a circular bed and surround it with bush varieties and herbs.
This creates a natural trellis effect as the vines spiral outward, while the herbs (like basil or thyme) deter pests. The spiral also makes weeding and harvesting a breeze—no more crawling through tangled vines!
For container gardening, I swear by self-watering fabric pots filled with a mix of compost and coconut coir. These pots prevent root rot while allowing vining squash to climb small A-frame trellises attached to the pot’s sides.
Place them on a patio or balcony with full sun, and you’ll be harvesting mini zucchinis by mid-summer.
Don’t overlook the power of vertical gardening in small spaces. I installed a DIY trellis wall in my backyard using PVC pipes and chicken wire, then trained spaghetti squash to grow vertically. The result?
A 6-foot tall harvest tower that fits in the same footprint as a single bush plant. Plus, the fruits dangle at waist height, making them easy to pick without bending over.
Remember, the golden rule is to prioritize airflow—even in creative layouts. If your squash leaves start touching, it’s time to thin or adjust your trellis. And always harvest regularly to encourage more production. With these strategies, you’ll transform even the tiniest garden into a high-yielding squash powerhouse! 🎃